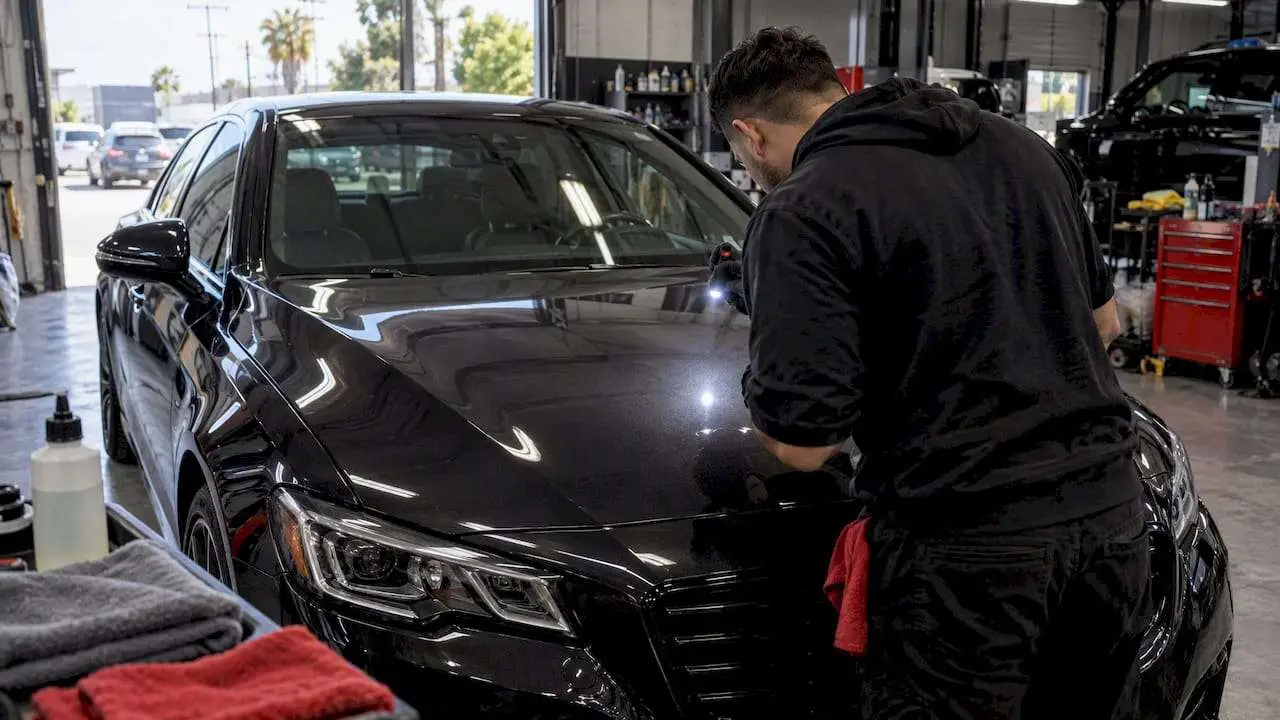

Most high spots are fixable, and the fix depends entirely on how much time has passed since application. Move the car to shade or a garage, angle an LED light across the panel, and run a light microfiber swipe over the suspect area. If the mark stays put and doesn’t lift with the towel, it’s cured. Stop there. Don’t reach for a heavy pad or an aggressive polish until you know what you’re dealing with.
TL;DR:
- High spots are usually caused by excess product application, rushing the wipe, or improper leveling, and can often be fixed within the first hour of curing.
- Inspection with low-angle raking light and microfiber swipe tests is crucial to accurately identify high spots, as they resist towel removal and are barely visible in flat lighting.
- Reactivation of fresh coating within 60 minutes can dissolve excess material, but after 12 hours, only light hand polishing is effective before requiring machine correction.
- Fully cured high spots typically need professional machine polishing and reapplication, especially if they cover multiple panels or show signs of coating failure.
- Using appropriate tools such as plush microfibers, safe spray polishes, and controlled environment application can help prevent high spots during the initial coating process.
Table of Contents
- What High Spots Actually Look Like (And Why They’re Not Dirt)
- How to Inspect a Panel for High Spots
- The Repair Ladder: What to Do Based on How Long Ago You Coated
- Tools That Work and Products That Make It Worse
- Preventing High Spots During Application
- When It’s Bigger Than a Spot Fix
- Do High Spot Fixes Differ by Coating Brand?
- What We See on the Shop Floor
- Ready to Fix High Spots the Right Way?
- Sources
- FAQ
What High Spots Actually Look Like (And Why They’re Not Dirt)
A high spot is uneven, over-thick coating that cured before it could level out. It reads as a raised patch, sometimes only visible when light rakes across the panel at a low angle.
Dirt, water spots, and bird etching all look different under inspection, and knowing the difference saves you from ruining a good panel chasing the wrong problem.
- Rainbow-like sheen or oily streaks that shift color as you change your viewing angle
- A mirror-like ridge that catches light differently than the surrounding panel
- Darker patches visible mainly under raking light, almost invisible in flat overhead lighting
- A ridge you can feel with light fingertip pressure, even when you can’t quite see it
Water spots and surface dust smear or lift when you wipe them with a towel. Cured high spots don’t. That resistance to the towel test is the single most reliable tell.
The usual causes: too much product applied to the applicator, missing a section during leveling, letting the coating flash too fast because of heat or direct sun, or simply rushing the wipe down before the solvent carrier evaporated evenly.
How to Inspect a Panel for High Spots
Good inspection is 90 percent of this job. Skip it and you’ll either miss a real defect or scrub at something that isn’t one.
- Set up in shade or indoors. Direct sunlight washes out the subtle ridges you’re trying to spot and can trick you into missing a real defect.
- Angle an LED light across the panel at a low, raking angle rather than straight on. This is the same trick professional detailers use to catch swirl marks.
- Run a visual scan panel by panel, walking around the car slowly rather than standing in one spot.
- Do a microfiber swipe test on anything suspicious. Contamination smears or lifts. A cured high spot resists and keeps its shape.
- Probe with a dab of spray polish on stubborn spots. If the mark softens or moves, you’re looking at surface residue, not a bonded defect.
- Log the location of every spot you confirm, with a phone photo under the raking light, before you touch anything.
Pro Tip: Take your inspection photos at the same angle every time. When you come back an hour later to check your progress, comparing two shots taken from different angles will fool you into thinking you fixed something you didn’t.
The Repair Ladder: What to Do Based on How Long Ago You Coated
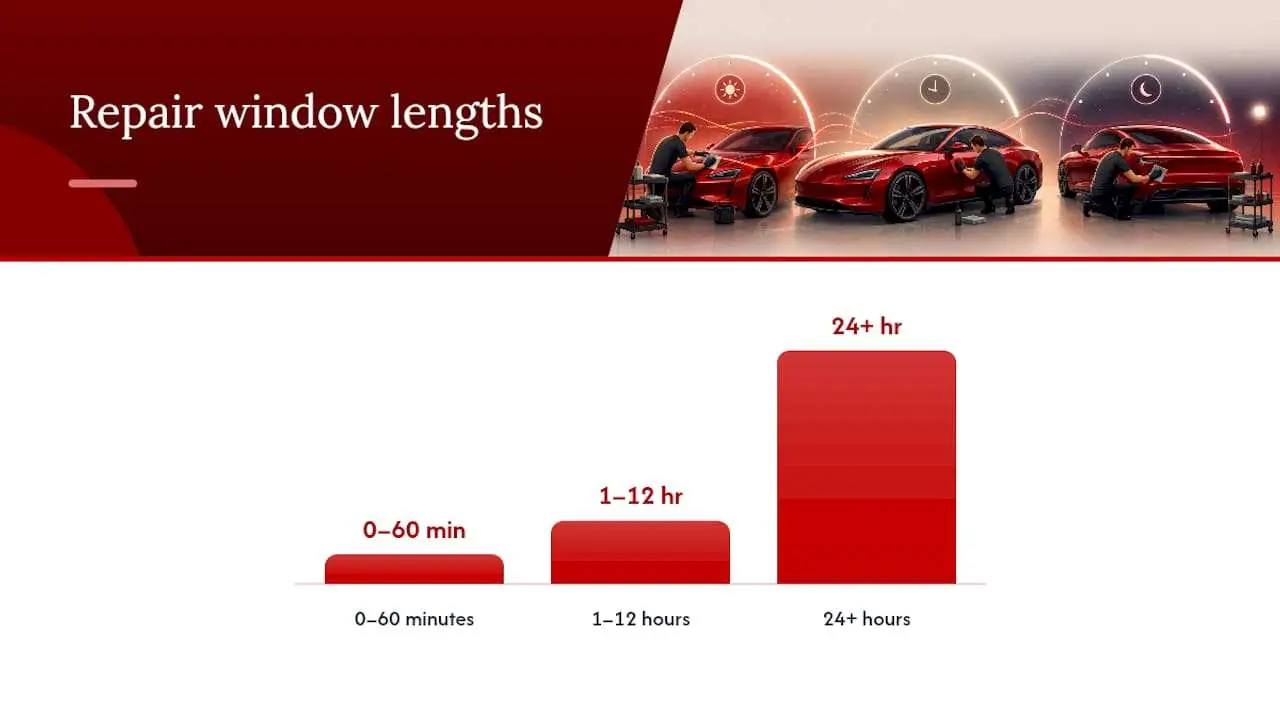
Time since application changes everything about how you fix a high spot. What works in the first hour will do nothing 24 hours later, and what you’d need after full cure can actually make an early-stage spot worse.
0 to 60 minutes: reactivate it. This is the low-risk, high-reward window. If the coating hasn’t finished curing, applying a small drop of the same coating directly onto the high spot and immediately leveling it with a fresh microfiber will often dissolve and redistribute the excess material. Buff to a shine with a clean, dry section of the towel. This works because the solvent carrier in the fresh product softens the recently laid-down residue instead of just smearing it around.
1 to 12 hours: gentle hand polishing. The coating is partially cured but not rock hard yet. Use a dedicated spray polish rated safe for ceramic coatings and a dense, plush microfiber. Work in short, light passes, checking your progress under raking light after every two or three swipes.
- Never bear down hard. Let the polish and the towel do the work, not your arm.
- Stop and re-inspect frequently. Cured coating removes faster than you’d expect once it starts to give.
- If the spot doesn’t budge after several careful passes, stop. You’re past the window for hand correction.
24 hours and beyond: machine or professional correction. By this point the coating is fully cured, and hand polishing usually isn’t strong enough to shift it. A dual-action polisher with a soft finishing pad and a polish designed for coated surfaces gives you controlled, predictable removal. This step will strip coating from that localized area, so plan on recoating the spot once you’re done. If a shop takes it on, expect paint correction before recoating to be part of the conversation, since polishing and recoating go hand in hand.
When to stop and call it: if you’ve made two or three careful, incremental passes with no visible change, further machine work is more likely to create a new problem than solve the old one. That’s your signal to book a professional correction instead of pushing further on your own.
Tools That Work and Products That Make It Worse
The right tools make this a controlled, low-drama fix. The wrong ones turn a small cosmetic issue into a bigger repair bill.
What to use:
- Plush, short-nap microfibers, one fresh towel per panel rather than reusing a dirty one
- A spray polish specifically labeled safe for ceramic and graphene coatings
- An LED raking light for every inspection pass, not just the first one
- A dual-action polisher paired with a soft foam finishing pad for anything past the hand-polish stage
What to avoid:
- Aggressive rubbing compounds or heavy-cut abrasives, which will cut into the clear coat long before they finish the coating
- Silicone-based polishes, which can leave behind residue that interferes with a future recoat bonding properly
- Saturated, dripping towels, which spread dissolved resin into a streak instead of lifting it away
- Working in direct sunlight, where heat accelerates flashing and makes every correction attempt less predictable
Rotate towels often and skip fabric softener in the wash. Softener residue transfers onto the microfiber and shows up as new streaking on your next job, which defeats the entire point of using a clean towel in the first place.
Preventing High Spots During Application
Most high spots trace back to three things: too much product, poor panel discipline, or bad timing. Fix those and you largely eliminate the problem before it starts.
- Work small. Break the car into roughly 2×2 foot sections rather than trying to coat an entire door or hood in one pass. Manufacturer application guides consistently point to section size as the biggest single factor in even leveling.
- Load the applicator sparingly. A few drops go further than you think. Overloading is the number one cause of the excess product that eventually cures into a ridge.
- Apply in a crosshatch pattern, then follow with a second pass at a 90 degree angle to catch anything the first pass missed.
- Control your environment. Moderate temperatures, low humidity, and shade all slow the flash time down enough to give you room to correct mistakes before they set.
- Use the three-towel system. One towel for the initial wipe-down, a second for the secondary buff, and a third, completely clean towel reserved only for the final inspection pass under raking light.
When It’s Bigger Than a Spot Fix
A few isolated high spots are a correction job. Widespread haze, cloudy patches across multiple panels, or coating that’s lifting at the edges is a different problem, and it usually means the bonding process failed somewhere in the application, not just in one section.
- Widespread haze or delamination across large areas typically calls for full professional stripping and reapplication, not spot treatment.
- Over-polishing is the real risk of DIY escalation. Every machine pass removes a small amount of clear coat, and it’s easy to thin an area without realizing it until you check under strong glare and see a slightly different reflection than the surrounding paint.
- Document every pass you make, and stop the moment you notice the surface starting to look different rather than better.
- A professional correction typically starts with a full panel assessment, moves through controlled machine passes with measured product removal, and ends with either a spot recoat or a full re-prep and recoat if the failure runs deeper than one area. Shops like Diamond Brite’s removal guidance outline why full stripping is sometimes the safer route compared to chasing a failing coating panel by panel.
If you’re already wondering whether your coating is on its way out rather than just uneven, it’s worth reading up on the signs a ceramic coating needs reapplying before you commit to another round of correction.
Do High Spot Fixes Differ by Coating Brand?
The core diagnostic process, raking light, towel test, spray-polish probe, stays the same no matter what product cured on the panel. What changes between brands is timing and chemical resistance, and both matter a lot if you’re trying to reactivate a spot instead of polishing it out.
Some coatings flash and cure faster than others, which shrinks or extends your reactivation window. A fast-curing SiO2 formula might give you 20 to 30 minutes before reactivation stops working, while a slower-curing graphene-infused product can leave that window open closer to an hour. This is exactly why checking the specific product’s documented flash time matters more than following a generic rule of thumb.
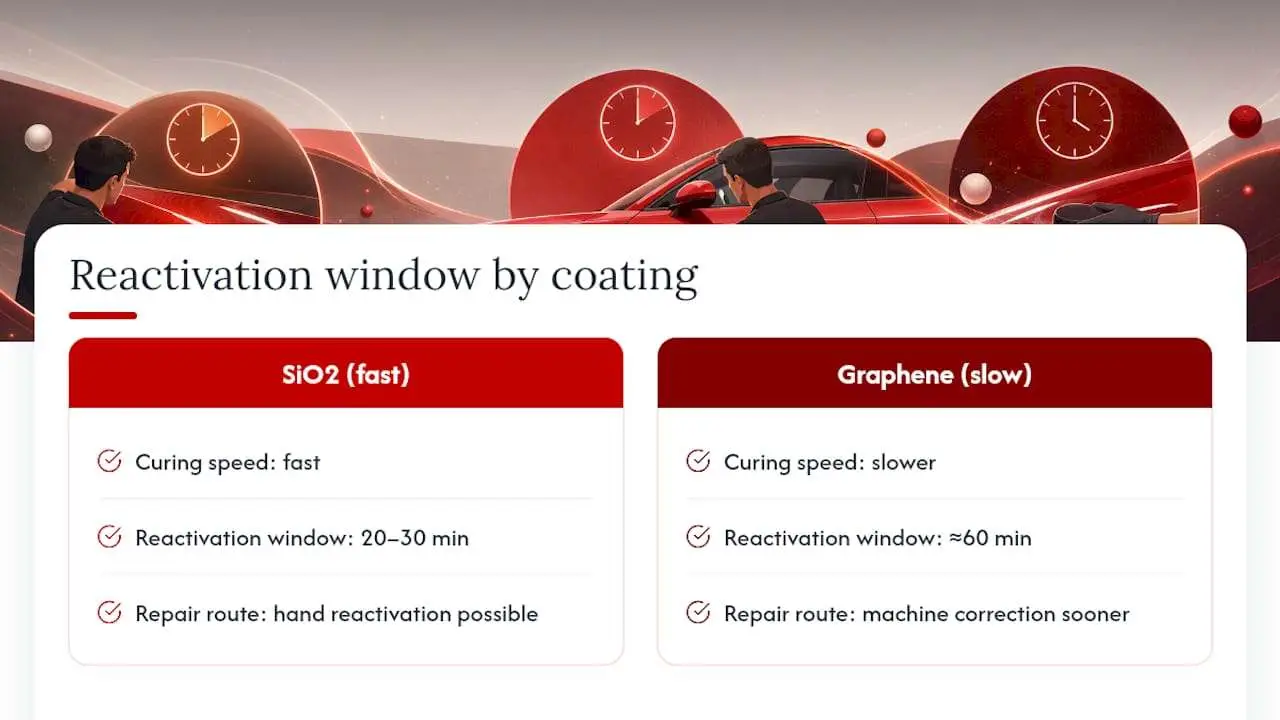
Hardness also varies once cured. Multi-layer or graphene-reinforced coatings tend to cure harder and more resistant to polish, meaning a hand-polish pass that would shift a basic single-layer coating might barely touch a premium multi-layer build. That usually pushes the repair straight to machine correction sooner than it would with a softer formula.
Compatibility during recoat matters too. Not every coating bonds cleanly over a different brand’s residue, so if a shop strips a section down to bare clear coat for correction, they typically recoat with the same product line rather than mixing brands on one vehicle. If you’re unsure which coating is on your car, or whether it’s still doing its job at all, it’s worth reviewing what makes a coating worth maintaining before deciding how aggressive a fix to pursue.
What We See on the Shop Floor
At PPF Pros, high spots are one of the most common corrections we get asked about, and almost every case comes down to timing. We run LED raking-light inspections on every panel and stick to a three-towel system because it catches problems before they cure into something bigger. Localized polish handles most cases; full re-prep and recoat only come up when haze or delamination shows up across several panels. If you’re booking an estimate, bring raking-light photos, a rough timeline of when the coating went on, and notes on anything you already tried.
— Jake
Ready to Fix High Spots the Right Way?
If your DIY attempts at fixing high spots aren’t holding up, or you’re staring at a panel with more than one questionable spot, a shop visit costs a lot less time and risk than another round of guesswork with a polisher. Professional shops handle localized ceramic correction and spot recoats regularly, and for cars that need more than a touch-up, pairing the fix with an XPEL PPF upgrade can protect the reworked area from future issues.
Bringing raking-light photos and your coating’s application date speeds up the assessment considerably. We’ll tell you straight whether a localized polish will do it or whether the panel needs a full re-prep. For cars heading toward a PPF upgrade alongside the correction, the paint protection film and free ceramic coating bundle covers both in one visit. Book an assessment and get a clear answer instead of another guess.
Sources
Before attempting a reactivation on your own, check your specific product’s documented flash time. Coating chemistry varies enough between brands that a generic rule of thumb can backfire. The 3M application SOP covers panel-by-panel technique in detail, while DetailKing’s guide to fixing high spots walks through when machine polishing is the safer call over continued hand correction.
- Ceramic Coating High Spots How to Fix
- How to Apply Ceramic Coating Without Streaks or High Spots
- 3M ceramic coating application SOP
FAQ
How do you get high spots out of ceramic coating?
Within the first hour, reapply a small amount of the same coating and level it with a fresh microfiber. After that window closes, gentle hand polishing works for a few hours, and fully cured spots typically need machine polishing followed by a spot recoat.
What are the signs that ceramic coating is failing?
Water no longer beads tightly, the surface loses its slick feel, and you may notice dulling or streaking that wasn’t there right after application. A closer look at when reapplication becomes necessary covers the full list of warning signs.
What are high spots in ceramic coating?
High spots are raised, unevenly cured patches of coating that show up as a mirror-like ridge or an oily, rainbow-tinted streak, usually visible only under angled light.
What is the downside of ceramic coating?
Ceramic coating doesn’t prevent rock chips or deep scratches, requires careful application to avoid defects like high spots, and eventually needs maintenance or reapplication as it wears down over time.